
Crafting Magic: Your Guide to a Stunning Chalk Couture Resin Project
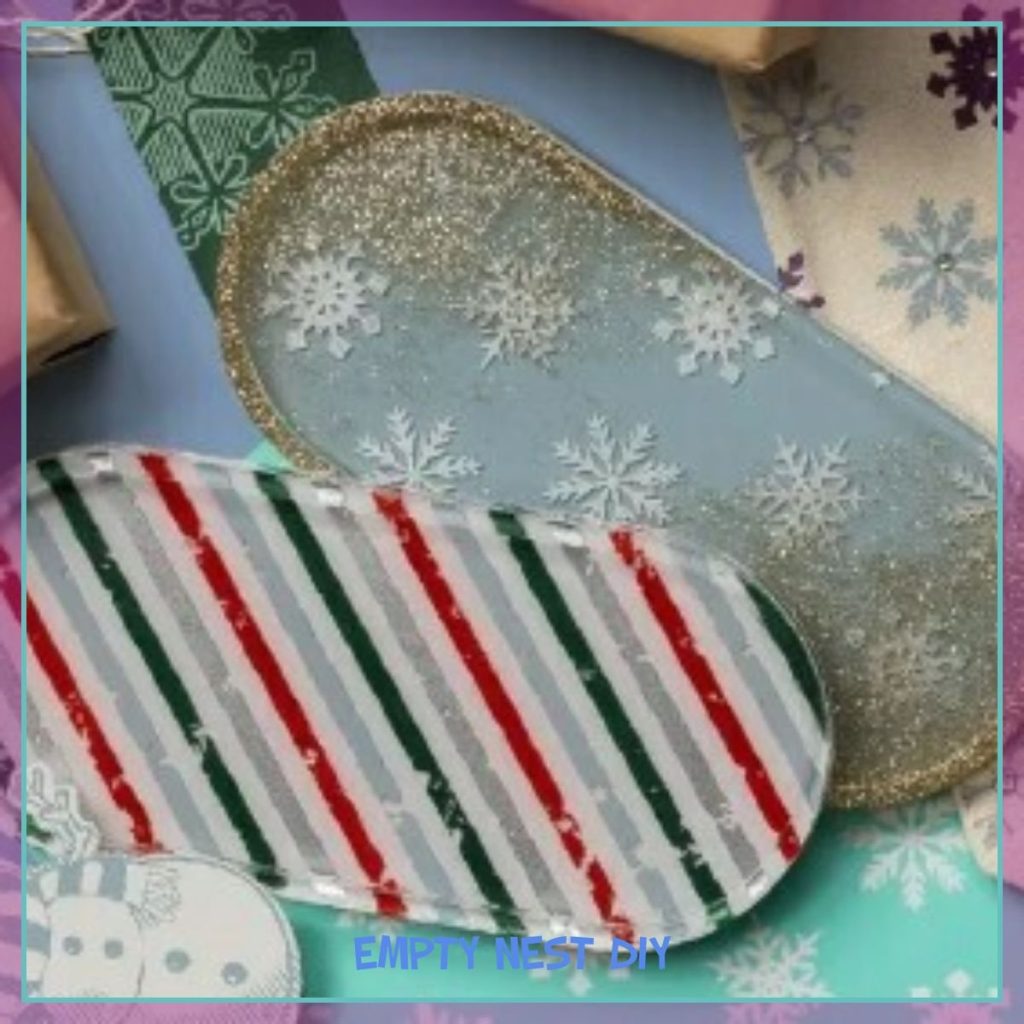
Chalk Couture Resin Project
Chalk Couture has revolutionized the world of home décor and crafting with its innovative use of chalk pastes and stencils, allowing crafters to create stunning designs with ease. However, the creative potential of Chalk Couture goes beyond traditional applications on chalkboards and cloth by introducing a new dimension with resin projects. If you are a chalk art lover and also play around with resin, then you are going to love this new idea & project. By combining the versatility of Chalk Couture’s design elements with the durability and aesthetic appeal of resin, crafters can make unique, eye-catching pieces that enhance any space. Whether you are a seasoned crafter or a beginner eager to explore new techniques, this guide will provide you with step-by-step instructions, essential tips, and inspiring project ideas. Let's dive in!
This post contains affiliate links, which means we may receive a commission, at no cost to you if you make a purchase through a link. Please see our full disclosure for more information.
Necessary Tools for Your Chalk Couture Resin Project
When starting a creative chalk project, having the right tools is critical for achieving the best results. Obviously, you'll want to choose a Chalk Couture transfer or screen and some chalk paste in a color that will go with your project. A sturdy squeegee is also necessary for a clean application, and you'll want some other helpful tools to make sure your project is a success. I've written a whole article on the nine essential items you should have on hand when creating a chalk couture project. So, gather up these items and make sure you've ordered your Resin Kit.
In addition to the essential materials, having the right tools on hand can greatly enhance the success of your project. Some people use a digital scale when using resin. I honestly never have. I use the small measuring cups and make sure I'm measuring as accurately as possible. Safety equipment like gloves is necessary to protect your hands while you are mixing and pouring the epoxy resin. You'll need some small plastic cups and stir sticks (I use wooden popsicle sticks) and a heat gun if you have one. Make sure your work space is protected as well with some old newspapers or craft paper to protect your surface.
Supply List:
- Epoxy resin
- Chalk Couture transfers
- Mixing cups and sticks
- Protective gloves
- Silicone molds
- Heat gun or torch
Where to find Resin Supplies
You can get your Chalk Couture supplies by clicking the button above. You can purchase disposable gloves (I use latex gloves), mixing cups and sticks from Amazon, Michaels or a local big box store.
I have found small red plastic disposable cups in a 2 ounce size which makes it perfect for mixing small amounts. However, there aren't any measurements on the cup so that makes it tricky. Amazon sells small cups with measurements on them, which is very helpful as you can measure, stir, and pour all from one cup.
Step-by-Step Resin Instructions
Begin by carefully measuring the resin and hardener in the recommended proportions, typically found in the product guidelines. In this case, we are using the Chalk Couture resin and it is mixed at a one to one ratio. That means you should mix equal parts of resin and hardener. It is vital to mix these components thoroughly to ensure a proper cure; using a clean mixing container and stirring stick can help achieve a uniform blend without bubbles.
For this project, I'd suggest making 1-2 oz or resin. I've not received my mold yet (I was so excited, I had to let ya'll know about this cool new addition!). Once the resin is combined it will harden, so only mix what you need.

How do you know when it's mixed?
You'll want to stir it well, but don't stir too vigorously or you will incorporate lots of bubbles into your mixture. It may take several minutes to ensure it's thoroughly mixed. I look to see if there are any “streaks” in the mixture – if there are keep stirring. These are the 2 mixtures that are not fully mixed.

Once the mixture is ready, pour the resin into the silicone molds, taking care to fill them evenly and avoid filling them too full so they don't overflow. If you want your chalk design on your epoxy piece to be permanent then you'll only want to fill your mold about 3/4 full. Making sure you can get all the bubbles out. A heat gun is useful for this exercise. You will wave it over your resin project and watch the tiny bubbles pop. If you have some farther down in the project, try using a small toothpick to get them to the surface. You will want to work quickly before the resin sets.
You'll also want to make sure that your silicone mold is placed on a protected surface that is even. This will ensure that your resin will be level and even once it's cured.
Allow the resin to cure according to the manufacturer’s instructions, which may vary depending on the type and environmental conditions. The chalk couture resin should take about 24 hours to cure. During this curing period, it's advisable to keep the molds in a dust-free environment to prevent unwanted particles from settling on the surface. After the designated curing time has elapsed,it's time to chalk!

Place your chalk couture transfer on the fully cured resin object. Using chalk paste apply the paste with a squeegee, ensuring even coverage over the stencil, then carefully lift the stencil away to reveal the design underneath. Allow the chalk paste to dry completely before applying the next layer of resin.

You'll want to repeat the steps above making some new resin and pouring it in the mold to make sure it is full but not overflowing. Let it cure.
Once it is fully cured, demold your project. Since these are silicone molds, removing the mold should be simple.

Curing plays a critical role in the final outcome of your projects. To achieve the best results, ensure that you follow the manufacturer's guidelines regarding curing times and conditions. Temperature and humidity can impact the curing process, so it's important to work in a controlled environment. For best results, allow the resin to cure undisturbed, free from dust and debris. If imperfections such as bubbles are present, a heat gun or torch can gently be used to eliminate them; however, care should be taken to avoid overheating the resin.
So, let's recap:
- Gather your Chalk Supplies (order your resin kit here)
- Prepare your Workspace (protect your area & yourself)
- Mix your resin thoroughly
- Pour it into the mold, filling it 3/4 way full
- Let resin set for 24 hours (or per recommended time)
- Apply Chalk Couture transfer & apply paste
- Peel off transfer & clean transfer
- Let Chalk design dry
- Mix resin and fill remainder of mold
- Let resin sit for 24 hours.
- Remove your amazing creation from the mold
- Repeat as often as desired!
Other Resin Design Ideas
For added creativity, experiment with layering different colors of resin or adding mixed media elements like glitter, dried flowers, or metallic powders into your designs. This means you can create lots of different designs in your mold and each piece will be unique!
Think of using other items too like sand and seashells or small buttons and sewing items to make your items truly unique.
The Chalk Couture resin project offers a unique and creative avenue for crafters and chalkers to create something different. By combining the versatility of resin with the vibrant designs of Chalk Couture, artists can create stunning, personalized pieces that are truly unique. So, whether you're a seasoned creator or just starting out, this project is simple and fun. As you explore the possibilities of resin art, remember to embrace the process and let your creativity shine. With the right techniques and a little patience, your results can be nothing short of amazing!
If you love working with epoxy, be sure to check out my other blog post about creating expoxy cups.
If you enjoyed this and want to know more, I'd like to invite you to sign up for my Newsletter. This is where you get all the up-to-date info on sales, exclusive deals, bundles, and more! You can find me socially over on my Facebook page, follow me on Pinterest and subscribe to my Youtube channel. When you shop from my Chalk Couture site you help support my small business and this site (and I REALLY appreciate your business!).
Be sure to check out these amazing project kits!


